
Friday 20 January 2012
Finishing the walls
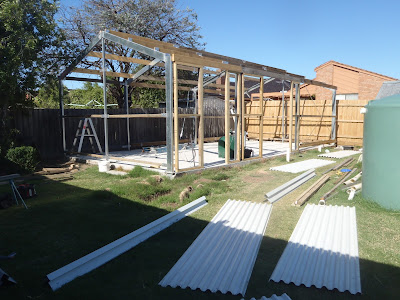
Today's aim was to finish off the walls.To begin, I installed two sections of "c section" steel which will eventually support the mezzanine floor at each gable end. A bit fiddly, but I was careful enough and it went together without a hitch. I then marked the final sheets, cut the taper at the gable and reassembled the whole lot. Finally, I installed the small sections of sheeting around the door frames and this part of the project is pretty much complete. The next step is to instal the down pipes and insulation prior to the corrugated iron roofing. I have a bit of work to do before I get to that stage.

Thursday 19 January 2012
The end walls today
Kept at it today after a slow start. Needed to speak to people regarding windows, insulation and had to see Mick regarding another couple of lengths of steel. Once I got back to the job I finished the first end and moved onto the final end of the shed. Not quite finished but in a pretty good spot to finish off all the cladding tomorrow. It's looking good and all the walls are nice and straight which is just the way I hoped it would be.


Wednesday 18 January 2012
The remaining walls
After a day off due to hot weather I resumed today. Cal and Lach were busy, so I was on my own. It was all a bit slow for the first couple of sheets until I worked out how to manage on my own but after a bit of pactice and a few swear words I made pretty good progress. Finished the easy wall with doorways and no cutting required and finished the day with the first of the gable ends. I'll continue tomorrow but I also need to visit the window manufacturer and also Mick the engineer for a bit of advice along the way. Hope to be finished the sheets before we go away on Monday.


Tuesday 17 January 2012
Fixing the sheets
Preliminaries out of the way, it was time for the sheets. Lach and Cal offered to help and we were ready to go. The forecast was for a windy and hot day, not perfect but we made a start. Tight work for Lach, who skinnied his way along the fence fixing and squaring the sheets while Cal who was straddling the fence kept the sheets plumb and level. I measured and cut and assisted where I could, hot slow work but it came along alright. Cameron and Indi surveyed the work late in the afternoon. One wall complete and another windy hot day forecast for today. We will consider our options before we go too much further. Might be prudent to add a few sheets and head for the pool for the remainder of the day.


Sunday 8 January 2012
Formation of doors and window
After completing the external frame it was time to identify doorways and window spaces. Mick's on holidays and couldn't weld, so I bought some treated pine and went to work. Standard sized doorway for the storeroom and slightly wider double door for the shed. Boxed up the frame and dyna bolted the frames to the slab. Only have to true up the roof and I'll be ready to put on the cladding. Lach and Kathy came to have a look at the progress so far.


Tuesday 3 January 2012
Timber framing begins
I managed to salvage a heap of framing timber from the demolition of a couple of rooms at my school. This occurred courtesy of Kevin Rudd, who provided schools with new classrooms as part of the economic stimulus package. When they demolished my school classrooms I salvaged the sub floor structure. I didn't like the idea of good timber being scrapped and I knew I'd use it somehow. A community worker denailed it for me and it was sent home and wrapped in plastic until used. This is the timber I have used as framing. It's heavy and will provide a strong structure to fix my cladding to. I began to assemble this with help from Lach. Didn't want to fall from the ladder and we worked together lifting and bolting. Not hard, but any time you are up a ladder with heavy beams you need to take care, especially if you are teachers and not builders. We made good progress.


Monday 2 January 2012
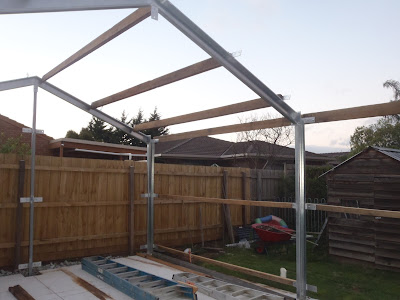
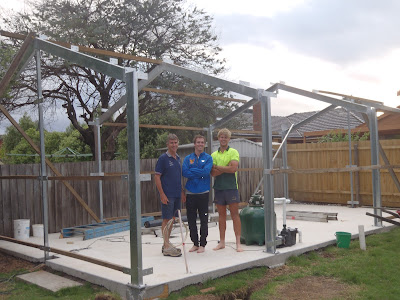
Steel work begins
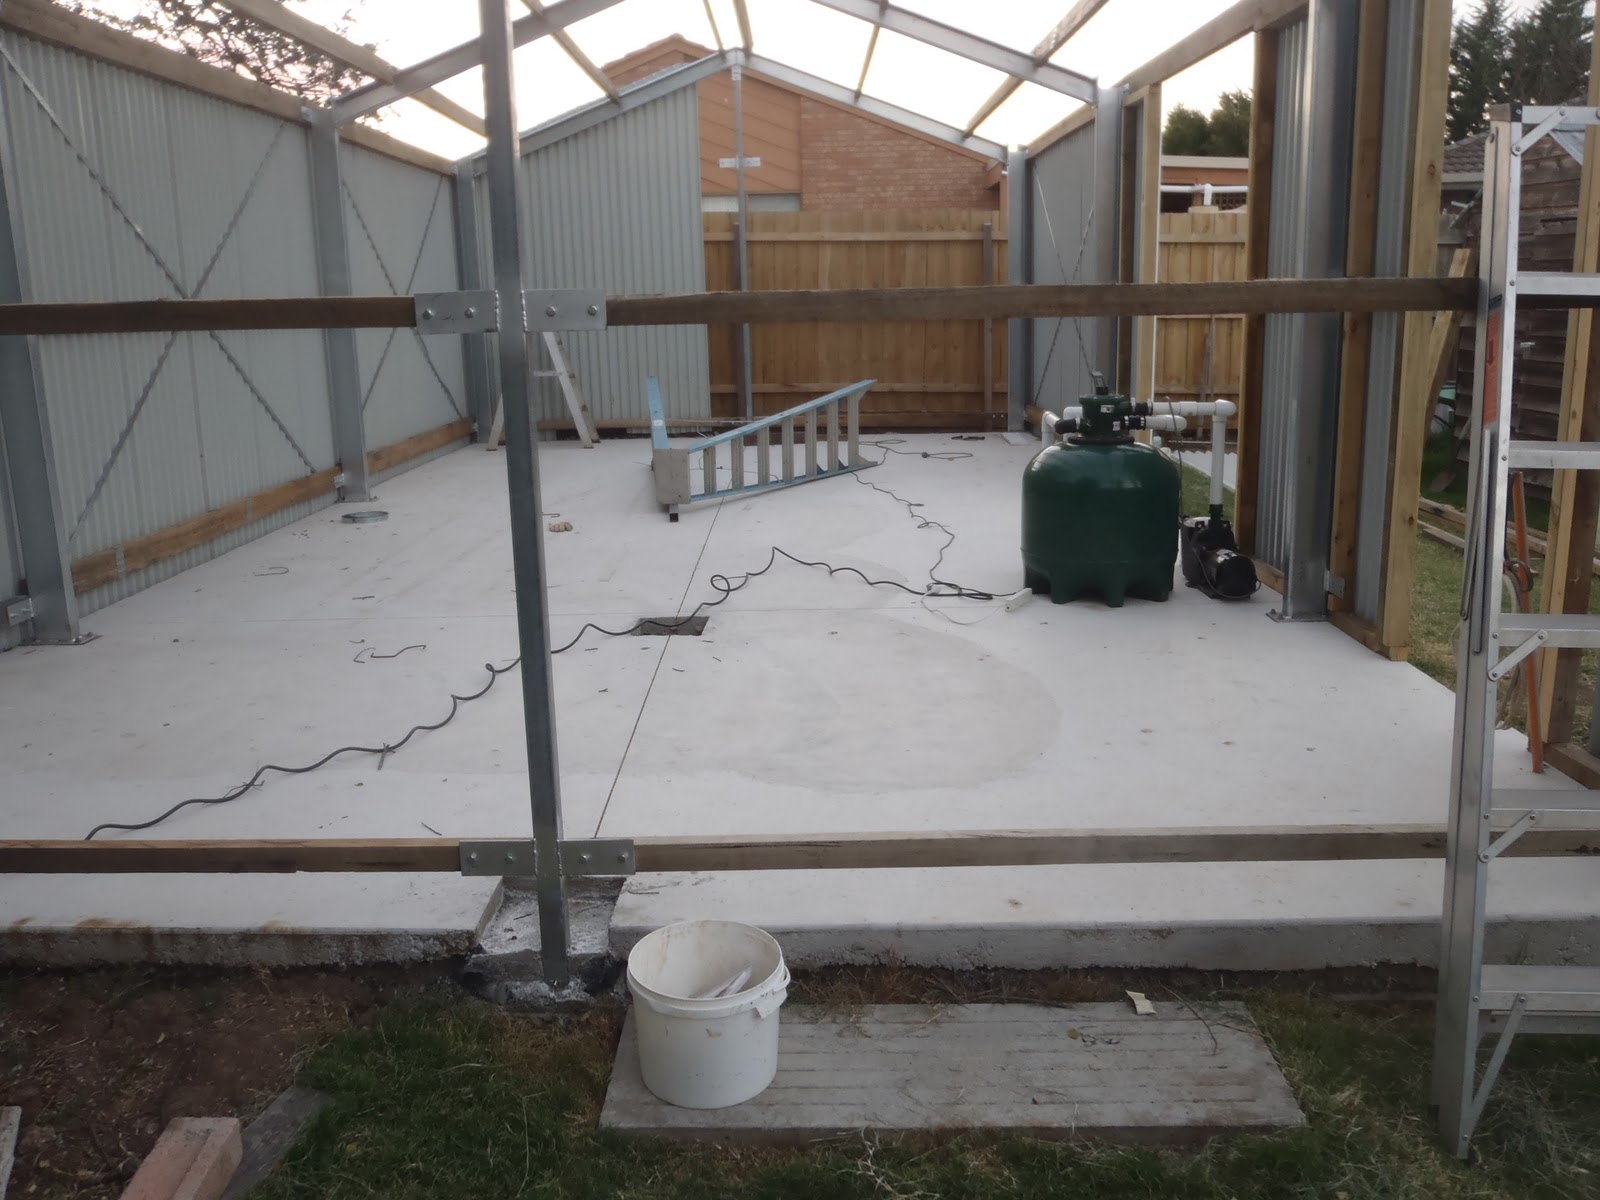
While all of the previous works were planned and completed I had also been working with Mick Chandler on the design of the shed and how he could weld it all up to make it all fit together. He built me some perfect footings which had been set into the slab and the intention was to bolt the steel structure onto the footings as we assembled it. A bit risky and exacting work but our careful preparation meant, once the structure was delivered, it would bolt together without a hitch. It's great to work with people who have the same attention to detail as myself. Mick did an outstanding job.


The new slab
After finalising the dimensions and orientation I was ready to box up the slab in preparation for the pour in early November. Rob spent a couple of hours with me boxing it all up. Accuracy was extremely important and I had a great concreter mate who was very particular with his work. After the boxing, we had to put the work on hold while we travelled to Paris (see other blog). Once we returned, the footings were carefully placed and concreted in, the rock and reo was laid and we organised the concrete pour. Helpers for the morning were Rob, Lach, Cal, Denis and myself. A big mornings work but it all went to plan and the end result was just perfect. We were ready for the next stage.


Demolition of old shed
Before I could build the new shed, I had to dismantle the old one and re-position the pool filter. I started with storm water and trenches for the pool filter. Once these were installed I dismantled the shed, with assistance from Lach, Cal and Pete. That just left the slab to be removed. A jack hammer, a 3 metre skip and 2 days work was all it took. Add a morning to fill the skip and we had an empty corner for the first time in 18 years.


Things to consider
Before I started I needed to consider a range of things. Some of these were: the overall size, the orientation, height to spouting, accurate costs compared to company supplied sheds. After checking with my contractors regarding their availability and costs I decided I would build my own shed. This involved permits from council, plans drawn and approved, portal frames welded, concrete slab poured and finally the new shed erected.
The beginning
Everyone needs a bigger shed, especially as they get closer to retirement. I have been very happy with the one below, however, if some of the construction materials for a new shed are made available to you for nothing, you're mad if you don't start to hatch a plan.


Subscribe to:
Posts (Atom)